Create Password Protected PDF Files On Your Mac
In the office I often use different word processors and text writing software applications. The majority of my output files are generated by the nifty (especially for a long time Windows user) option “Print > Save to PDF”. In a number of cases I needed a bit more private PDF documents, password protection would be just enough.
There are a number of tools like Adobe Acrobat that can set a password to a PDF file, but I really didn’t want to spend a couple of hundred dollars. Besides that, my geek side wanted to get this passworded PDF option via some kind of a workaround.
In this article I will describe in detail how to create password protected PDF files on Mac OS X by using a freely available command line utility, as well as an Automator Workflow.
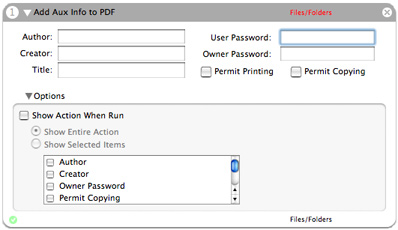
Googling the Web I found out an article by Masayuki Nii that created an application for Mac OS X Tiger. In a pretty straight forward way it used PDFKit for setting passwords and privileges to PDF documents. The software package will install a pdfauxinfo command line utility, as well as an Automator action called “Add Aux Info to PDF” that will be available under PDF actions of the Automator tool.
I will be covering both the Automator way of creating password protected PDF files, as well as using the pdfauxinfo command line utility for the same end result. My suggestion is to use the Automator action, as it can be very easily incorporated into a customizable Workflow.
Bonus information: Besides the password purposes I am focusing on in this article, pdfauxinfo can be used for some additional tasks such as setting up copy/print privileges and changing the PDF file author, creator and title. I just wanted to mention this, so you are not puzzled with some extra functions that can be seen on some of the screenshots.
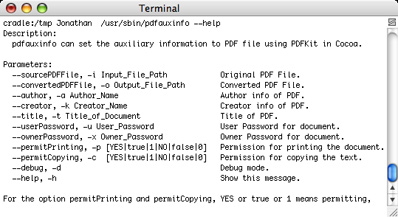
After downloading and executing the package, pdfauxinfo is automatically installed to /usr/sbin/pdfauxinfo. Afterwards, you can move it to another location, but be advised that the Automator way of using the application will stop working.
The –help parameter will show you the program options:

Creating a password protected PDF version of the existing file can be done by entering this simple arguments:

-i -> existing PDF file
-o -> new password protected PDF file
-u -> user password needed for unlocking the PDF file
Don’t set -x (Owner password) as this option is used just for the privileges related to the PDF file. FYI – if you setup just the Owner password and let’s say permit printing, anyone will be able to open the PDF file, but won’t be able to print it.
Automator is a fine way of using some great program options available in different actions. I mentioned before that installing the application automatically created an Automator action. It looks like this:

Filling in the needed information, in this case just the User password, is very simple, but for using this Automator action we need to bundle it with a couple of others.
As the action requires Files/Folders input, the best way is to put “Get Specified Finder Items” or “Ask for Finder Items”. I am using the first one because it gives me the opportunities of selecting multiple PDF files from a number of different locations.
These two actions combined in a workflow could be just enough, but from my experience there is a need for a better finish. By just combining “Get Specified Finder Items” and “Add Aux Info to PDF”, all the newly created password protected PDF files will be automatically placed in the /tmp directory on your computer. It is much better to add “Move Finder Items” as the third action so you get this workflow:

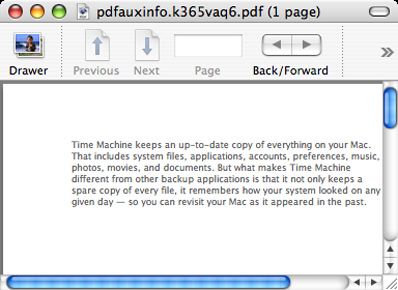
This workflow now password protects chosen PDF files and moves them to the location you specify. The only negative aspect I came across in the process is that by using the Automator action you cannot specify the output file name. If you were thinking that this is done by enabling “Replace existing files” checkbox of the “Move Finder Items” action, you are wrong as this is just a move action. The output file gets a random file name such as pdfauxinfo.k365vaq6.pdf. Quite possibly there is an Automator action that can take the file name and rename it, but I didn’t use it.
Accessing password protected PDF files
Opening a newly created password protected file in Preview:


Opening a newly created password protected file in Adobe Reader 8.1.0:


Opening a newly created password protected file in Adobe Reader 8.1.0 on Microsoft Windows Vista:


This is it. A free way of creating password protected PDF files on Mac OS X Tiger.