STAT Scanner 5.27
Introduction
A security scanner is one of the most important software titles in a network administrator’s toolbox so naturally I was happy to try out a new one. When I got Harris Corporation’s STAT Scanner I noticed that it is the first vulnerability assessment scanner to receive Common Criteria certification, a rigorous international standard for information technology security evaluation and certification. This means that it is suitable to be used in high-assurance environments such as those used in national security. This is a piece of information that automatically raised my expectations.
Let’s get down to the details and see what this tool brings. Please note that throughout the review you can click the screenshots to get to the big version.
Basic information
![]() While the STAT Scanner runs from a machine running Windows NT, 2000, XP or Windows Server 2003, it can scan a wide range of targets. The ones listed in the official documentation include Windows (NT 3.51, NT 4.0, 95, 98, 2000, Me, XP, Server 2003), Sun Solaris 2.5.1 and later, Red Hat Linux 6.2 and later, Mandrake Linux 7.1 and later, HP-UX 10, 11 and later, HP Printers as well as Cisco Routers.
While the STAT Scanner runs from a machine running Windows NT, 2000, XP or Windows Server 2003, it can scan a wide range of targets. The ones listed in the official documentation include Windows (NT 3.51, NT 4.0, 95, 98, 2000, Me, XP, Server 2003), Sun Solaris 2.5.1 and later, Red Hat Linux 6.2 and later, Mandrake Linux 7.1 and later, HP-UX 10, 11 and later, HP Printers as well as Cisco Routers.
If you’re wondering about the hardware requirements, read this document to get all the details. As for the administrative and system requirements for local host and target machine scans, I invite you to examine this file that contains all the details, too many of them to mention in this review.
Scanning
When you start scanning first you get a prompt where you can define what information you want to receive. Naturally, the less information you request the less amount of time it will take to complete the scan.

After the scan is performed, the STAT Scanner immediately opens two new windows, one containing the ports and services report and the other containing a scan summary. The main window displays all the information gathered by the scanner, as shown below:
As you can see from the screenshot above, the scan reveals a myriad of information including the CVE-ID, the Bugtraq ID, the SANS ID, etc. All of this can help you get more information regarding a problem. If you want in-depth details regarding a specific problem, all you have to do is double click it and you get more information stored in several tabs. Here’s an example:
As you can see, every vulnerability is followed by a lot of information packed with links for online resources. You can view the information in the separate window or print it out. I recommend using the report generator for this though, it gives you much more control on what is printed and it’s formatted better for paper output. Once the vulnerabilities have been detected you can take advantage of the AutoFix feature to fix some of them across the network.
What’s important to note here is the fact that what the STAT Scanner does is “safe scanning”, meaning that vulnerabilities are identified through engineered signatures and not simulated attacks. This is excellent since you can be sure that your machines won’t be harmed during the scan. If you want to schedule the scanner to do unattended scans, you can use the STAT Scanner in its command line interface that allows it to be run from a command prompt window, batch file, or task scheduler.
As expected, the scanner comes with pre-defined sets of vulnerabilities that can be used when assessing target machines. You can use these sets or you can edit them and build your own sets. That’s not all though, you can also merge different sets into one. As regards other scanning options that can be customized, there are really a lot of things you can adapt to your needs. Advanced users will certainly appreciate this level of customization that gives them full control of their scanning activities.
The reports
Both the managers and the technical staff will be very pleased with the reports. Below are two samples of the many reports available in the STAT Scanner, the executive summary and the vulnerability summary report.
Generating reports is very simple and intuitive and the scanner provides with various templates that will suit everyone’s needs. The reports can be exported to a variety of formats – PDF, XLS, RTF, XML, and many others.
Documentation
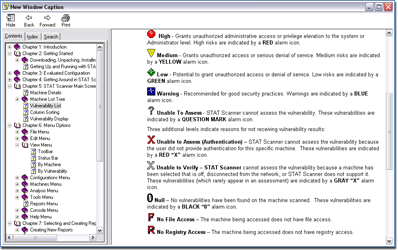
The help file that comes with the scanner will answer most of your questions. The organization of the topics is pretty standard and shouldn’t be much different from other help files you’ve used before. Among other things here you’ll find the syntax for the command line interface of the scanner.
Final thoughts
The STAT Scanner clearly shows how a good tool can help you efficiently identify holes and patch them. Once you get familiar with its interface, you can scan computers in just a few clicks and get the adequate report both to your technical team and to the management.
The interface is very intuitive and once you get used to the program’s icons you’ll be able to perform various tasks faster without using the menus. The look of the program should be improved and made perhaps a bit more modern but this is just a cosmetic issue and does not affect in any way the user interacts with the scanner.
All in all I found the STAT Scanner to be fast, reliable and very easy to use.


